- StrutsTestCase is a JUnit extension that specifically targets Struts applications. This framework essentially mocks a servlet container, such that you can run and test a Struts application virtually rather than having to run it in Tomcat. The framework also has a handy MockStrutsTestCase class, which extendsTestCase and handles a lot of the Struts configuration aspects for you (such as loading the struts-config.xml configuration file).
- DbUnit is a JUnit extension that facilitates placing a database into a known state between test runs. Using XML seed files, you can insert specific data into a database, which a test case can then rely on. Moreover, using the DbUnit API, you can easily compare the contents of the database to the contents of an XML file, thus providing a mechanism to verify expected database results outside of application code.
Showing posts with label struts. Show all posts
Showing posts with label struts. Show all posts
Wednesday, 31 July 2013
Testing Struts Applications
In the latest article in the "In pursuit of code quality" series, Andrew Glover discusses a quality-centered approach to the test on Struts, using JUnit's StrutsTestCase, DbUnit. Here is a brief summary :Since the struts Action classes are the entry point to the business logic, there is too much coupling associated with them. Testing struts based application needs the use of a servlet container, HttpServletRequest and HttpServletResponse classes. Simpler tools are available for testing such applications:
Tuesday, 30 July 2013
Strecks 1.0 released
Strecks a set of Java 5-specific extensions Struts framework, was released from beta on friday. Strecks, is annotation based and adds a number of modern features to Struts-based applications, including POJO actions, dependency injection, declarative validation and data binding, interceptors, pluggable views, as well as seamless Spring integration. It is also highly extensible and amenable to test driven development. The following is a brief list of features available in Strecks 1.0:
- Pure POJO action beans with zero framework dependencies
- Annotation-based dependency injection (typed request parameters, session attributes, Spring beans, and many others)
- Converters and validators type-parameterized using Java 5 generics
- Mechanisms for facilitating use of redirect after post pattern
- Support for rendering using Spring MVC Views and View Resolvers
- Pre- and post- action interceptors, with access to dependency resolved action beans as well as full runtime context
- Works on the unchanged Struts 1.2.x and 1.3.x code bases.
- Actions, form validation and data conversion easily testable with plain unit tests, with no additional test libraries required.
Struts: Paging and Sorting with Displaytag
In the previous post, I described the use of Displaytag to implement paging in a simple JSP. In this example, I describe the use of Displaytag to implement sorting along with paging in Struts.
Skip to Sample Code
In this example, we take a single input field, which is used to filter the employee list based on the minimum salary. Follow these steps to implement the solution.
Skip to Sample Code
In this example, we take a single input field, which is used to filter the employee list based on the minimum salary. Follow these steps to implement the solution.
- Start by importing struts-blank.war file into Eclipse.
- Follow the configuration steps 1, 2, 4, 5, and 6 in from the "Pagination with Displaytag" post.
- Create the search page as shown below
<%@ page language="java" contentType="text/html; charset=ISO-8859-1" pageEncoding="ISO-8859-1"%>
<%@ taglib uri="http://struts.apache.org/tags-bean" prefix="bean"%>
<%@ taglib uri="http://struts.apache.org/tags-html" prefix="html"%>
<%@ taglib uri="http://struts.apache.org/tags-logic" prefix="logic"%>
<%@ taglib uri="http://displaytag.sf.net" prefix="display"%>
<%@ page import="beans.Employee,data.DAO,java.util.List,org.displaytag.tags.TableTagParameters,org.displaytag.util.ParamEncoder"%>
<html:html>
<head>
<title>Search page</title>
<link rel="stylesheet" type="text/css"
href="/StrutsPaging/css/screen.css" />
</head>
<body bgcolor="white">
<html:form action="/search.do">
<table>
 <tr>
   <td>Minimum Salary:</td>
   <td><html:text property="minSalary"></html:text></td>
 </tr>
 <tr>
   <td colspan="2"><html:submit property="submit" /></td>
 </tr>
</table>
</html:form>
<logic:notEqual name="empList" value="null">
<jsp:scriptlet>
 if (session.getAttribute("empList") != null) {
   String sortBy = request.getParameter((new ParamEncoder("empTable")).encodeParameterName(TableTagParameters.PARAMETER_SORT));
   DAO.sort((List) session.getAttribute("empList"), sortBy);
 }
</jsp:scriptlet>

<display:table name="sessionScope.empList" pagesize="4" id="empTable" sort="external" defaultsort="1" defaultorder="ascending">
 <display:column property="empId" title="ID" sortable="true" sortName="empId" headerClass="sortable" />
 <display:column property="empName" title="Name" sortName="empName" sortable="true" headerClass="sortable" />
 <display:column property="empJob" title="Job" sortable="true" sortName="empJob" headerClass="sortable" />
 <display:column property="empSal" title="Salary" sortable="true" headerClass="sortable" sortName="empSal" />
</display:table>
</logic:notEqual>
</body>
</html:html>
pages/search.jsp Note that- The display:table tag has the sort attribute defined as "external".
- Since the sort type is external, we have to provide for the actual sorting, which I implemented in the DAO class itself (see below).
- The column to sort by is obtained by the following peice of code
request.getParameter((new ParamEncoder("empTable")).encodeParameterName(TableTagParameters.PARAMETER_SORT))
- Create the Action class and Form bean as shown below.
public class SearchAction extends Action {
public ActionForward execute(ActionMapping mapping, ActionForm form, HttpServletRequest request, HttpServletResponse httpservletresponse) throws Exception {
if (form == null) {
return mapping.findForward("success");
}
try {
SearchForm searchForm = (SearchForm) form;
if (searchForm.getMinSalary().equals("")) {
 return mapping.findForward("success");
}
long minSal = Long.parseLong(searchForm.getMinSalary());
List data = DAO.getData(minSal);

request.getSession().setAttribute("empList", data);

} catch (Exception e) {
e.printStackTrace();
}
return mapping.findForward("success");
}
}
actions.SearchAction public class SearchForm extends ActionForm {
private String minSalary;
public String getMinSalary() {
return minSalary;
}
public void setMinSalary(String minSalary) {
this.minSalary = minSalary;
}
}forms.SearchForm.java - Modify the struts-config.xml to include the action and actionform as shown below
<form-beans>
<form-bean name="searchForm" type="forms.SearchForm" />
</form-beans>
<action-mappings>
<action path="/Welcome" forward="/pages/Welcome.jsp" />
<action name="searchForm" path="/search"
type="actions.SearchAction" scope="session">
<forward name="success" path="/pages/search.jsp"></forward>
</action>
</action-mappings> - Create the DAO class as shown below
public class DAO {
public static List getData(long minSal) {
 SessionFactory sessionFactory = new Configuration().configure().buildSessionFactory();
 Session session = sessionFactory.getCurrentSession();
 List result = null;
 try {
   session.beginTransaction();
   result = session.createQuery("from Employee as emp where emp.empSal >=?").setLong(0, minSal).list();
   System.out.println("Result size : " + result.size());
   session.getTransaction().commit();
 } catch (Exception e) {
   e.printStackTrace();
 }
 return result;
}

public static List sort(List<Employee> list, String sortBy) {
 Comparator comp = getComparator(sortBy);
 Collections.sort(list, comp);
 return list;
}

private static Comparator getComparator(String sortBy) {
 System.out.println("Sort by : " + sortBy);
 if (sortBy ==null) {
   return new NameComparator();
 }
 if (sortBy.equals("empName"))
   return new NameComparator();
 if (sortBy.equals("empId"))
   return new IdComparator();
 if (sortBy.equals("empSal"))
   return new SalComparator();
 if (sortBy.equals("empJob"))
   return new JobComparator();

 return null;

}

private static class NameComparator implements Comparator {
 public int compare(Object emp1, Object emp2) {
   Employee employee1 = (Employee) emp1;
   Employee employee2 = (Employee) emp2;
   return employee1.getEmpName().compareTo(employee2.getEmpName());
 }
}

private static class IdComparator implements Comparator {
 public int compare(Object emp1, Object emp2) {
   Employee employee1 = (Employee) emp1;
   Employee employee2 = (Employee) emp2;
   return new Long(employee1.getEmpId()).compareTo(new Long(employee2.getEmpId()));
 }
}

private static class SalComparator implements Comparator {
 public int compare(Object emp1, Object emp2) {
   Employee employee1 = (Employee) emp1;
   Employee employee2 = (Employee) emp2;
   return new Long(employee1.getEmpSal()).compareTo(new Long(employee2.getEmpSal()));
 }
}

private static class JobComparator implements Comparator {
 public int compare(Object emp1, Object emp2) {
   Employee employee1 = (Employee) emp1;
   Employee employee2 = (Employee) emp2;
   return employee1.getEmpJob().compareTo(employee2.getEmpJob());
 }
}

}
DAO.java Note here that- The list sorting is done in this class itself.
- The Comparators are used to compare order the list based on each individual field (there may be scope for improvement here).
Monday, 29 July 2013
Integrating Struts 2.0 with Spring
In the past, I posted an example on how to use Displaytag with Struts and Spring, using Spring JDBC for data access(1, 2). In this post, I will describe how to do the same using Struts 2.0. The only major step that needs to be done here is to override the default Struts 2.0 OjbectFactory. Changing the ObjectFactory to Spring give control to Spring framework to instantiate action instances etc. Most of the code is from the previous post, but I will list only the additional changes here.
- Changing the default Object factory: In order to change the Ojbect factory to Spring, you have to add a declaration in the struts.properties file.
struts.objectFactory = spring
struts.devMode = true
struts.enable.DynamicMethodInvocation = false
src/struts.properties - The Action class: Here is the code for the action class
package actions;

import java.util.List;

import business.BusinessInterface;

import com.opensymphony.xwork2.ActionSupport;

public class SearchAction extends ActionSupport {
private BusinessInterface businessInterface;

private String minSalary;

private String submit;

private List data;

public String getSubmit() {
 return submit;
}

public void setSubmit(String submit) {
 this.submit = submit;
}

public BusinessInterface getBusinessInterface() {
 return businessInterface;
}

  public String execute() throws Exception {
 try {
   long minSal = Long.parseLong(getMinSalary());
   System.out.println("Business Interface: " + businessInterface + "Minimum salary : " + minSal);
   data = businessInterface.getData(minSal);
   System.out.println("Data : " + data);

 } catch (Exception e) {
   e.printStackTrace();
 }

 return SUCCESS;
}

public void setBusinessInterface(BusinessInterface bi) {
 businessInterface = bi;
}

public String getMinSalary() {
 return minSalary;
}

public void setMinSalary(String minSalary) {
 this.minSalary = minSalary;
}

public List getData() {
 return data;
}

public void setData(List data) {
 this.data = data;
}
}
SearchAction.java - The Action class here does not have access to the HttpServetRequest and HttpServletResponse. Hence the action class itself was changed to the session scope for this example (see below)
- In order for the action class to be aware of the Http Session, the action class has to implement the ServletRequestAware interface, and define a setServletRequest method, which will be used to inject the ServletRequest into the action class.
- The BusinessInterface property is injected by Spring framework.
- The struts Configuration:
<!DOCTYPE struts PUBLIC
     "-//Apache Software Foundation//DTD Struts Configuration 2.0//EN"
     "http://struts.apache.org/dtds/struts-2.0.dtd">
<struts>
<package name="Struts2Spring" namespace="/actions" extends="struts-default">
 <action name="search" class="actions.SearchAction">
   <result>/search.jsp</result>
 </action>
</package>
</struts>
src/struts.xml - The action's class attribute has to map the id attribute of the bean defined in the spring bean factory definition.
- The Spring bean factory definition
<?xml version="1.0" encoding="UTF-8"?>
<beans xmlns="http://www.springframework.org/schema/beans" xmlns:xsi="http://www.w3.org/2001/XMLSchema-instance"
xsi:schemaLocation="http://www.springframework.org/schema/beans http://www.springframework.org/schema/beans/spring-beans-2.0.xsd http://www.springframework.org/schema/aop http://www.springframework.org/schema/aop/spring-aop-2.0.xsd"
default-autowire="autodetect">
<bean id="dataSource" class="org.apache.commons.dbcp.BasicDataSource" destroy-method="close">
 <property name="driverClassName">
   <value>oracle.jdbc.driver.OracleDriver</value>
 </property>
 <property name="url">
   <value>jdbc:oracle:thin:@localhost:1521:orcl</value>
 </property>
 <property name="username">
   <value>scott</value>
 </property>
 <property name="password">
   <value>tiger</value>
 </property>
</bean>

<!-- Configure DAO -->
<bean id="empDao" class="data.DAO">
 <property name="dataSource">
   <ref bean="dataSource"></ref>
 </property>
</bean>
<!-- Configure Business Service -->
<bean id="businessInterface" class="business.BusinessInterface">
 <property name="dao">
   <ref bean="empDao"></ref>
 </property>
</bean>
<bean id="actions.SearchAction" name="search" class="actions.SearchAction" scope="session">
    <property name="businessInterface" ref="businessInterface" />
  </bean>
</beans>
WEB-INF/applicationContext.xml - The bean definition for the action class contains the id attribute which matches the class attribute of the action in struts.xml
- Spring 2's bean scope feature can be used to scope an Action instance to the session, application, or a custom scope, providing advanced customization above the default per-request scoping.
- The web deployment descriptor
<?xml version="1.0" encoding="UTF-8"?>
<web-app id="WebApp_9" version="2.4" xmlns="http://java.sun.com/xml/ns/j2ee" xmlns:xsi="http://www.w3.org/2001/XMLSchema-instance"
xsi:schemaLocation="http://java.sun.com/xml/ns/j2ee http://java.sun.com/xml/ns/j2ee/web-app_2_4.xsd">

<display-name>Struts2Spring</display-name>

<filter>
 <filter-name>struts2</filter-name>
 <filter-class>org.apache.struts2.dispatcher.FilterDispatcher</filter-class>
</filter>

<filter-mapping>
 <filter-name>struts2</filter-name>
 <url-pattern>/*</url-pattern>
</filter-mapping>

<listener>
 <listener-class>org.springframework.web.context.ContextLoaderListener</listener-class>
</listener>
<listener>
 <listener-class>org.springframework.web.context.request.RequestContextListener</listener-class>
</listener>
<welcome-file-list>
 <welcome-file>index.html</welcome-file>
</welcome-file-list>
</web-app>
web.xml The only significant addition here is that of the RequestContextListener. This listener allows Spring framework, access to the HTTP session information. - The JSP file: The JSP file is shown below. The only change here is that the action class, instead of the Data list is accessed from the session.
<%@ page language="java" contentType="text/html; charset=ISO-8859-1" pageEncoding="ISO-8859-1"%>
<%@ taglib uri="http://displaytag.sf.net" prefix="display"%>
<%@ taglib prefix="s" uri="/struts-tags"%>
<%@ page import="actions.SearchAction,beans.Employee,business.Sorter,java.util.List,org.displaytag.tags.TableTagParameters,org.displaytag.util.ParamEncoder"%>
<html>
<head>
<title>Search page</title>
<link rel="stylesheet" type="text/css" href="/StrutsPaging/css/screen.css" />
</head>
<body bgcolor="white">
<s:form action="/actions/search.action">
<table>
  <tr>
    <td>Minimum Salary:</td>
    <td><s:textfield label="minSalary" name="minSalary" /></td>
  </tr>
  <tr>
    <td colspan="2"><s:submit name="submit" /></td>
  </tr>
</table>
</s:form>
<jsp:scriptlet>

 SearchAction action = (SearchAction)session.getAttribute("actions.SearchAction");
 session.setAttribute("empList", action.getData());
  if (session.getAttribute("empList") != null) {
   String sortBy = request.getParameter((new ParamEncoder("empTable")).encodeParameterName(TableTagParameters.PARAMETER_SORT));
   Sorter.sort((List) session.getAttribute("empList"), sortBy);

 </jsp:scriptlet>

<display:table name="sessionScope.empList" pagesize="4" id="empTable" sort="external" defaultsort="1" defaultorder="ascending" requestURI="">
<display:column property="empId" title="ID" sortable="true" sortName="empId" headerClass="sortable" />
<display:column property="empName" title="Name" sortName="empName" sortable="true" headerClass="sortable" />
<display:column property="empJob" title="Job" sortable="true" sortName="empJob" headerClass="sortable" />
<display:column property="empSal" title="Salary" sortable="true" headerClass="sortable" sortName="empSal" />
</display:table>
<jsp:scriptlet>
  }
 </jsp:scriptlet>

</body>
</html:html>
search.jsp - The Other required classes: The following other classes have been used for the example, and they can be obtained from the previous posts (1, 2).
- Employee.java
- BusinessInterface.java
- Sorter.java
- DAO.java
- EmpMapper.java
Saturday, 27 July 2013
Struts 2: Info and Resources
Struts has been the most popular web application framework for the past few years. With this popularity have come enhancements and changes due not only to the changing requirements, but also to provide features available in newer frameworks. The new version Struts 2.0 is a combination of the Sturts action framework and Webwork. According to the Struts 2.0.1 release announcement, some key changes are:
- Improved Design - All Struts 2 classes are based on interfaces. Core interfaces are HTTP independent.
- Intelligent Defaults - Most configuration elements have a default value that we can set and forget.
- Enhanced Results - Unlike ActionForwards, Struts 2 Results can actually help prepare the response.
- Enhanced Tags - Struts 2 tags don't just output data, but provide stylesheet-driven markup, so that we can create consistent pages with less code.
- First-class AJAX support - The AJAX theme gives interactive applications a significant boost.
- Stateful Checkboxes - Struts 2 checkboxes do not require special handling for false values.
- QuickStart - Many changes can be made on the fly without restarting a web container.
- Easy-to-test Actions - Struts 2 Actions are HTTP independent and can be tested without resorting to mock objects.
- Easy-to-customize controller - Struts 1 lets us customize the request processor per module, Struts 2 lets us customize the request handling per action, if desired.
- Easy-to-tweak tags - Struts 2 tag markup can be altered by changing an underlying stylesheet. Individual tag markup can be changed by editing a FreeMarker template. No need to grok the taglib API! Both JSP and FreeMarker tags are fully supported.
- Easy cancel handling - The Struts 2 Cancel button can go directly to a different action.
- Easy Spring integration - Struts 2 Actions are Spring-aware. Just add Spring beans!
- Easy plugins - Struts 2 extensions can be added by dropping in a JAR. No manual configuration required!
- POJO forms - No more ActionForms! We can use any JavaBean we like or put properties directly on our Action classes. No need to use all String properties!
- POJO Actions - Any class can be used as an Action class. We don't even have to implement an interface!
Sunday, 14 July 2013
Manning-Struts 2 in Action ebook Download
 The original Struts project revolutionized Java web development and its rapid adoption resulted in the thousands of Struts-based applications deployed worldwide. Keeping pace with new ideas and trends, Apache Struts 2 has emerged as the product of a merger between the Apache Struts and OpenSymphony WebWork projects, united in their goal to develop an easy-to-use yet feature-rich framework. Struts 2 represents a revolution in design and ease of use when compared to classic Struts. It adds exciting and powerful features such as a plugin framework, JavaServer Faces integration, and XML-free configuration.
Struts 2 In Action introduces the Apache Struts 2 web application framework and shows you how to quickly develop professional, production-ready modern web applications. Written by Don Brown, one of the leading developers of Struts 2, Chad Davis, a passionate Struts 2 developer, along with Scott Stanlick, this book gently walks you through the key features of Struts 2 in example-driven, easy-to-digest sections.
Struts 2 in Action delivers accurate, seasoned information that can immediately be put to work. This book is designed for working Java web developers-especially those with some background in Struts 1 or WebWork. The core content, covering key framework components such as Actions, Results, and Interceptors, includes new features like the annotation-based configuration options. You'll find chapters on Struts 2 plugins, FreeMarker, and migration from Struts 1 and WebWork 2. Finally, new topics such as the Ajax tags, Spring Framework integration, and configuration by convention give familiar subjects new depth.
Learning Jakarta Struts 1.2 ebook Download
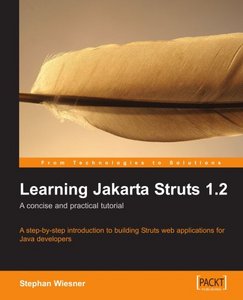 Product DescriptionThis book is designed as a rapid and effective Struts tutorial for Java developers. The book builds a fully-featured web bookstore application incrementally, with each stage described step-by-step. Concepts are introduced simply and clearly as the design and implementation of this sample project evolves.
The emphasis is on rapid learning through clear and well structured examples. This book is written for Java developers planning to develop web applications, who are new to Struts. It expects familiarity with Java, JSP and Servlets to a degree, although more obscure elements are explained. It covers Struts 1.2.
About the Author
Stephan Wiesner was born in October 1973 in L¿neburg, Germany. He graduated in business informatics in 2003. He got introduced to Struts during his studies. He didn't understand the official documentation for Struts and therefore started to develop his own documentation. Feedback from all over the world encouraged him and finally he published it as a book. He currently lives and works in Lucerne, Switzerland, as a QS consultant and test manager.
Struts Survival Guide: Basics to Best Practices
 Download this free Struts book: “Struts Survival Guide: Basics to Best Practices” in pdf format. This book teaches you how to build dynamic web sites in Java using Java Server Faces, using a hands-on, practical approach.
Description
Little or no prior experience in web development is necessary. However, to get the most out of this primer, you will need a reasonable knowledge of the programming in general, and the Java language in particular. A basic knowledge of HTML would help, too.
Topics covered: The basics and strengths of Struts, How to fill the gaps in Struts, Which features are important for J2EE projects, Develop professional Struts code by adopting proven strategies, How to handle exceptions in production Struts applications in the BEST way, Real practical benefits of customizing Struts, Best Practices and Strategies in Struts.
Contents
Getting Started
Struts Framework Components
Your first Struts application
All about Actions
Form Validation
Struts Tag Libraries
Struts and Tiles
Struts and I18N
Struts and Exception Handling
Effectively extending Struts
Thursday, 11 July 2013
Struts 2 Custom Validators
Struts 2 allows the use of Custom validators through the @CustomValidator annotation. The @CustomValidator annotation takes two mandatory parameters, type and message
To run this sample, follow these steps... There's More
- type: Refers to the "name" given to the validator in the validators.xml file.
- message: Message to be displayed when this validator fails.
To run this sample, follow these steps... There's More
- Create a simple struts project as described in the previous example, Struts 2 Validation : Annotations
- Create the new validator by extending the FieldValidatorSupport class
package validators;

import com.opensymphony.xwork2.validator.ValidationException;
import com.opensymphony.xwork2.validator.validators.FieldValidatorSupport;

public class NumberFieldValidator extends FieldValidatorSupport {

 public void validate(Object object) throws ValidationException {
       String fieldName = getFieldName();
       Object value = this.getFieldValue(fieldName, object);

     if (!(value instanceof String)) {
         return;
     }

     String str = ((String) value).trim();
     if (str.length() == 0) {
         return;
     }

     try {
        Double.parseDouble(str);
     }catch(NumberFormatException nfe) {
        addFieldError(fieldName, object);
      return;
     }
     try {
        Integer.parseInt(str);
     }catch(NumberFormatException nfe) {
        addFieldError(fieldName, object);
      return;
     }

 }
}
NumberFieldValidator.java - The custom validator may extend the FieldValidatorSupport or the ValidatorSupport classes.
- The FieldValidatorSupport class extends ValidatorSupport to add field specific information to the Field.
- The is numeric check is performed by trying to convert the input string to Integer or Double and catching any exception.
- The addFieldError method is used add any failed validations to the list of errors to be displayed.
- The getFieldName and getFieldValue methods are implemented in the superclasses to retrieve the field name and field value for the field beign validated.
- Declare the new custom validator in the validators.xml file. The validators.xml file must be in the classpath of the application.
<?xml version="1.0" encoding="UTF-8"?>
<!DOCTYPE validators PUBLIC
     "-//OpenSymphony Group//XWork Validator Config 1.0//EN"
     "http://www.opensymphony.com/xwork/xwork-validator-config-1.0.dtd">
<validators>
 <validator name="numericField" class="validators.NumberFieldValidator"/>
</validators>
validators.xml
Note: The name attribute of the validator must match the type attribute of the @CustomValidator Annotation used in the Action class. - Add the additional check to the Action class setPrice() method.
 @RequiredStringValidator(type = ValidatorType.FIELD, message = "Price Required")
@CustomValidator(type = "numericField", message = "Price must be a number")
public void setPrice(String price) {
 this.price = price;
}
AddTransactionAction.java
Note: the type attribute of the @CustomValidator Annotation must match the name of the validator as defined in the validators.xml file.
Struts 2 Validation : Annotations
In a previous post, I described how to use validations in Struts 2, using XML validation rules. This post will show how to use Annotation based validation in Struts 2. For this example I used the add transaction part of google's portfolio manager (noticed that they do not have validations over there). Struts 2 provides a number of validators for XML based validation rules. All of them have respective annotations defined and can be used in place of XML validation rules. In the example, we will use the @RequiredStringValidator, @RegexFieldValidator and also see how to parameterize messages when using annotations.
Follow these steps to implement the example ... There's more
Follow these steps to implement the example ... There's more
- Create a dynamic web project in Eclipse.
- Copy the following jar files into the WEB-INF/lib directory, all these files are available with sturts download.
- struts2-core-2.0.11.1.jar
- xwork-2.0.4.jar
- freemarker-2.3.8.jar
- commons-logging-1.1.1.jar
- ognl-2.6.11.jar
- Update your web deployment desciptor to include the sturts filter dispatcher.
<?xml version="1.0" encoding="UTF-8"?>
<web-app xmlns:xsi="http://www.w3.org/2001/XMLSchema-instance"
 xmlns="http://java.sun.com/xml/ns/javaee"
 xmlns:web="http://java.sun.com/xml/ns/javaee/web-app_2_5.xsd"
 xsi:schemaLocation="http://java.sun.com/xml/ns/javaee http://java.sun.com/xml/ns/javaee/web-app_2_5.xsd"
 id="WebApp_ID" version="2.5">
 <display-name>struts2Validation</display-name>
 <filter>
  <filter-name>struts2</filter-name>
  <filter-class>
   org.apache.struts2.dispatcher.FilterDispatcher
  </filter-class>
 </filter>
 <filter-mapping>
  <filter-name>struts2</filter-name>
  <url-pattern>/*</url-pattern>
 </filter-mapping>

 <welcome-file-list>
  <welcome-file>index.html</welcome-file>
 </welcome-file-list>
</web-app>
WEB-INF/web.xml - Create the input JSP
<%@ taglib prefix="s" uri="/struts-tags"%>
<html>
<head>
<title>Add Transaction</title>
</head>
<body>
<s:form action="addTransaction" validate="true" method="post">
<s:fielderror />
<table>
 <tr>
  <td>Symbol</td>
  <td><s:textfield name="symbol"></s:textfield></td>
 </tr>
 <tr>
  <td>Type</td>
  <td><s:select name="type" list="#{'':'Select One', 'BUY':'Buy','SELL':'Sell','BUY_COVER':'Buy to Cover','SELL_SHORT':'Sell Short'}">
  </s:select></td>
 </tr>
 <tr>
  <td>Date</td>
  <td><s:textfield name="date" ></s:textfield></td>
 </tr>
 <tr>
  <td>Number of Shares</td>
  <td><s:textfield name="numberOfShares"></s:textfield></td>
 </tr>
 <tr>
  <td>Price</td>
  <td><s:textfield name="price"></s:textfield></td>
 </tr>
 <tr>
  <td>Commission</td>
  <td><s:textfield name="comission"></s:textfield></td>
 </tr>
 <tr>
  <td>Notes</td>
  <td><s:textfield name="notes"></s:textfield></td>
 </tr>
 <tr>
  <td colspan="2"> <s:submit name="submit" value="submit"></s:submit>
  <s:submit name="submitNoValidate" value="submit without validation" method="noValidation"></s:submit> </td>

 </tr>
</table>
</s:form>
</body>
</html>
transactions.jsp
Note: The method="noValidation" indicates to struts that on submission, the noValidation() method will be invoked on the AddTransactionAction class. - Create the output JSP
<%@ taglib prefix="s" uri="/struts-tags"%>
<html>
<head>
<title>Transaction Added</title>
</head>
<body>
<s:bean name="actions.AddTransactionAction" id="addTransaction" ></s:bean>
<table>
 <tr>
  <td colspan="2">The following transaction has been added to your portfolio</td>
 </tr>
 <tr>
  <td>Symbol</td>
  <td><s:label name="symbol" value="%{symbol}" /></td>
 </tr>
 <tr>
  <td>Type</td>
  <td><s:label name="type" value="%{type}"  />
</td>
 </tr>
 <tr>
  <td>Date</td>
  <td><s:label name="date" value="%{date}"/></td>
 </tr>
 <tr>
  <td>Number of Shares</td>
  <td><s:label name="numberOfShares" value="%{numberOfShares}"></s:label></td>
 </tr>
 <tr>
  <td>Price</td>
  <td><s:label name="price" value="%{price}"></s:label></td>
 </tr>
 <tr>
  <td>Commission</td>
  <td><s:label name="comission" value="%{comission}"></s:label></td>
 </tr>
 <tr>
  <td>Notes</td>
  <td><s:label name="notes" value="%{notes}"></s:label></td>
 </tr>
</table>
</body>
</html>
done.jsp - Create the Action class
package actions;

import org.apache.struts2.interceptor.validation.SkipValidation;

import com.opensymphony.xwork2.ActionSupport;
import com.opensymphony.xwork2.validator.annotations.RegexFieldValidator;
import com.opensymphony.xwork2.validator.annotations.RequiredStringValidator;
import com.opensymphony.xwork2.validator.annotations.ValidatorType;
import com.opensymphony.xwork2.validator.annotations.Validation;

@Validation
public class AddTransactionAction extends ActionSupport {

 private String symbol;
 private String type;
 private String date;
 private String numberOfShares;
 private String price;
 private String comission;
 private String notes;


 public String execute() throws Exception {
  System.out.println("In Execute");

  return SUCCESS;
 }

 @SkipValidation
 public String noValidation() throws Exception {
  System.out.println("In Novalidation");
  return SUCCESS;
 }


 public String getSymbol() {
  return symbol;
 }

 @RequiredStringValidator(type = ValidatorType.FIELD, message = "Symbol Required")
 public void setSymbol(String symbol) {
  this.symbol = symbol;
 }


 public String getType() {
  return type;
 }

 @RequiredStringValidator(type = ValidatorType.FIELD, message = "Type Required")
 public void setType(String type) {
  this.type = type;
 }


 public String getDate() {
  return date;
 }

 @RequiredStringValidator(type = ValidatorType.FIELD, message = "Date Required")
 @RegexFieldValidator(type=ValidatorType.FIELD, message="",key="date.error.message", expression = "[0-9][0-9]/[0-9][0-9]/[1-9][0-9][0-9][0-9]")
 public void setDate(String date) {
  this.date = date;
 }


 public String getNumberOfShares() {
  return numberOfShares;
 }


 @RequiredStringValidator(type = ValidatorType.FIELD, message = " Number of Shares Required")
 public void setNumberOfShares(String numberOfShares) {
  this.numberOfShares = numberOfShares;
 }


 public String getPrice() {
  return price;
 }

 @RequiredStringValidator(type = ValidatorType.FIELD, message = "Price Required")
 public void setPrice(String price) {
  this.price = price;
 }


 public String getComission() {
  return comission;
 }

 @RequiredStringValidator(type = ValidatorType.FIELD, message = "Comission Required")
 public void setComission(String comission) {
  this.comission = comission;
 }


 public String getNotes() {
  return notes;
 }


 public void setNotes(String notes) {
  this.notes = notes;
 }
}
AddTransactionAction.java
Note:- The annotation @Validation is used to indicate that the current action might need validation. The validations on a method level can be skipped using the @SkipValidation annotation on the method.
- The method noValidations() uses the @SkipValidation annotation, you can see this when you click on "Submit without validation" in the JSP
- The @RequiredStringValidator annotation is used to indicate a Required Strint similar to the following xml rule
<validators>
<field name="numberOfShares">
<field-validator type="requiredstring">
    <message>Number of Share is required</message>
</field-validator>
</field>
</validators> - On the date field, I used a @RegexFieldValidator annotation, so that the date field will be mandated to have a given format.
- Parameterized messages: You will notice that the message attribute of the @RegexFieldValidator is set to an empty string, while the key is set to a value. This is due to the fact that the message attribute is mandatory, and the key attribute is used to denote the message key from the properties files. The parameters can be retrieved in the properties files using the ${date} notation where the "date" variable is expected to available in the value stack
- Create a definition for the action in struts.xml
<?xml version="1.0" encoding="UTF-8" ?>
<!DOCTYPE struts PUBLIC
"-//Apache Software Foundation//DTD Struts Configuration 2.0//EN"
"http://struts.apache.org/dtds/struts-2.0.dtd">

<struts>
<package name="struts2Validation" extends="struts-default">
 <action name="addTransaction"
  class="actions.AddTransactionAction">
  <result name="success">done.jsp</result>
  <result name="input">transactions.jsp</result>
 </action>
</package>
</struts>
struts.xml
Note: The result with name "input" is because the validator returns the result to input when validation fails. - Create the properties file for messages
date.error.message=Date ${date} is not properly formatted.package.properties
Note: In the properties file, ${date} is used to retrieve the "date" value from the value stack, this is the way Struts 2 supports parameterization. - Create the struts.properties file to set the theme to simple theme, so that you have more control how the UI components are laid out.
struts.ui.theme=simple
struts.properties
Wednesday, 10 July 2013
Struts Error
Struts error "Cannot find bean under name org.apache.struts.taglib.html.BEAN"
Check:
1.) Improper use of a struts tag.
2.) Form bean properties not properly set.
3.) When using tiles, make sure that forms are not nested.
4.) When <html /> <html:xxxxx> is defined outside of <html:form> </html:form>
Tuesday, 9 July 2013
Struts 2: Action Redirects
Struts 2.0 provides the ability to chain multiple actions into a defined sequence or workflow. Action chaining can be achieved in multiple ways:
- Action Chains: This feature works by applying a test:Chain Result to a given Action, and intercepting its target Action's invocation with a ChainingInterceptor.
- Redirect After Post: A common a pattern in web application development in which your action will result in a redirect to another action.
- Redirect Action Result: Uses ActionMapper provided by the ActionMapperFactory to redirect the browser to a URL that invokes the specified action. You can see a simple implementation of this in the struts-blank application. If you look at the example.xml file in the application you will can see that the Login action redirects the result to a different action "Menu".
<action name="Login!*" method="{1}" class="example.Login">In order to send parameters, use the <param></param> tag, as shown below
<result name="input">/example/Login.jsp</result>
<result type="redirect-action">Menu</result>
</action><param name="paramname">value</param>
- Redirect Result:Calls theHttpServletResponse.sendRedirect(), (a browser redirect). The consequence of doing this means that the action (action instance, action errors, field errors, etc) that was just executed is lost and no longer available. This is because actions are built on a single-thread model. The only way to pass data is through the session or with web parameters (?name=value). In the following code, you can see that the "Menu.Action" is used instead of just Menu.
<action name="Login!*" method="{1}" class="example.Login">
 <result name="input">/example/Login.jsp</result>
 <result type="redirect">Menu.action</result>
</action>
- Redirect Action Result: Uses ActionMapper provided by the ActionMapperFactory to redirect the browser to a URL that invokes the specified action. You can see a simple implementation of this in the struts-blank application. If you look at the example.xml file in the application you will can see that the Login action redirects the result to a different action "Menu".
Saturday, 6 July 2013
Struts 2: Validation
Update: A new post for validation in struts with annotation is available at: Struts 2 Validation: Annotations.
Struts 2.0 relies on a validation framework provided by XWork input validation. Along with basic validation and client-side Javascript validation offered in Struts 1.x, Struts 2 offers Ajax based validation. The following example demonstrates how to use Struts 2 validation, both basic and ajax validations. For this, the sample page used is shown below.
Basic Validation
For basic validaton, you have to define the validation rules in
Client Side Validation
For simple client-side validation without Ajax, just add a validate="true" to the form definition in the JSP, as follows:
Ajax Validation
Struts implements Ajax Validation by using DWR. For a quick start of DWR read Ajax in Java with DWR. Coming to Struts validation, follow these steps to setup DWR
Struts 2.0 relies on a validation framework provided by XWork input validation. Along with basic validation and client-side Javascript validation offered in Struts 1.x, Struts 2 offers Ajax based validation. The following example demonstrates how to use Struts 2 validation, both basic and ajax validations. For this, the sample page used is shown below.
<s:form action="RegisterUser">The Action definition is shown below:
<s:textfield name="userName" size="20" label="User Name" />
<s:textfield name="emailAddress" size="20" label="Email Address" />
<s:textfield name="dateOfBirth" size="20" label="Date Of Birth" />
<s:submit name="submit" value="submit" />
</s:form>
<action name="RegisterUser" method="registerUser" class="example.RegisterUser">Based on above definition, the Action class must have a method name registerUser.
<result name="input">/example/Register.jsp</result>
<result>/example/HelloWorld.jsp</result>
</action>
Basic Validation
For basic validaton, you have to define the validation rules in
<validators>Note that the "date of birth" field has two validators associated with it. The "regex" validator type takes a parameter by the name "expression" which is the regular expression used to validate the field. The message keys used in validation rules must be defined in "package.properties" file as follows:
<field name="userName">
<field-validator type="requiredstring">
<message key="requiredstring" />
</field-validator>
</field>
<field name="emailAddress">
<field-validator type="email">
<message key="fieldFormat" />
</field-validator>
</field>
<field name="dateOfBirth">
<field-validator type="requiredstring">
<message key="requiredstring" />
</field-validator>
<field-validator type="regex">
<param name="expression">
[0-9][0-9]/[0-9][0-9]/[1-9][0-9][0-9][0-9]
</param>
<message key="fieldFormat" />
</field-validator>
</field>
</validators>
requiredstring = ${getText(fieldName)} is required.
fieldFormat = ${getText(fieldName)} is not formatted properly.
Client Side Validation
For simple client-side validation without Ajax, just add a validate="true" to the form definition in the JSP, as follows:
<s:form action="RegisterUser" validate="true">Also note that the message keys do not work(atleast not for me), and you may have to define the error messages directly instead of through the properties file as follows:
<message>Date of birth is not formatted properly</message>
Ajax Validation
Struts implements Ajax Validation by using DWR. For a quick start of DWR read Ajax in Java with DWR. Coming to Struts validation, follow these steps to setup DWR
- Download DWR from here.
- Add DWR servlet mapping in the web deployment descriptor as shown below
<servlet>
 <servlet-name>dwr</servlet-name>
 <servlet-class>uk.ltd.getahead.dwr.DWRServlet</servlet-class>
 <init-param>
  <param-name>debug</param-name>
  <param-value>true</param-value>
 </init-param>
</servlet>
<servlet-mapping>
 <servlet-name>dwr</servlet-name>
 <url-pattern>/dwr/*</url-pattern>
</servlet-mapping> - In your WEB-INF directory, create a dwr.xml file and declare the struts validator as follows
<!DOCTYPE dwr PUBLIC
"-//GetAhead Limited//DTD Direct Web Remoting 1.0//EN"
"http://www.getahead.ltd.uk/dwr/dwr10.dtd">

<dwr>
<allow>
 <create creator="new" javascript="validator">
  <param name="class"
   value="org.apache.struts2.validators.DWRValidator" />
 </create>
 <convert converter="bean"
  match="com.opensymphony.xwork2.ValidationAwareSupport" />
</allow>

<signatures>
 <![CDATA[
 import java.util.Map;
 import org.apache.struts2.validators.DWRValidator;

 DWRValidator.doPost(String, String, Map<String, String>);
 ]]>
</signatures>
</dwr> - Change the form declaration in your JSP file to include "theme=ajax" as shown below
<s:form action="RegisterUser" validate="true" theme="ajax">
Friday, 5 July 2013
Data Access with Spring and Struts: Part 2
Part 1 of "Data Access with Spring and struts" described how to make a struts application ready to use spring. In this post, we will see how to implement spring data access.
- Create a RowMapper: A row mapper is used to map a single row in the ResultSet to any object. The iteration through the result set is taken care of by the JdbcTemplate class.
public class EmpMapper implements RowMapper {
public Object mapRow(ResultSet rs, int rowNum) throws SQLException {
 int empNo = rs.getInt(1);
 String empName = rs.getString(2);
 String empJob = rs.getString(3);
 long salary = rs.getLong(4);
 Employee emp = new Employee();
 emp.setEmpId(empNo);
 emp.setEmpJob(empJob);
 emp.setEmpSal(salary);
 emp.setEmpName(empName);
 return emp;
}
}
EmpMapper.java - Create the Data Access Object: The Data access object uses spring's JdbcTemplate class to query the database. The JdbcTemplate class helps separate the static parts of JDBC DAO code by performing
the common boilerplate tasks:- Retrieves connections from the datasource.
- Prepares statement object.
- Executes SQL CRUD operations.
- Iterates over result sets and populates the results in standard collection objects.
- Handles SQLException and translates it into a more explicit exception in the spring exception hierarchy.
public class DAO extends JdbcDaoSupport {
public long empId;
public String empName;
public String empJob;
public long empSal;
public String SQL = "SELECT EMPNO, ENAME, JOB, SAL " + "FROM EMP WHERE SAL >= ?";
public List getData(long minSal) {
 Long params[] = { minSal };
 JdbcTemplate daoTmplt = getJdbcTemplate();
 return daoTmplt.query(SQL, params, new EmpMapper());
}
}
DAO.java
Note that the DAO class has to extend JdbcDaoSupport, which defines the getJdbcTemplate() method. - Create the Business Interface: The business interface class acts as a simple facade to the DAO layer.
public class BusinessInterface {
 DAO empDAO;
 public List getData(long minSal){
   List empList = empDAO.getData(minSal);
   return empList;
 }
 public void setDao(DAO empDAO){
   this.empDAO = empDAO;
 }
}
BusinessInterface.java - Add the Action class, Business Interface and DAO to Spring
<?xml version="1.0" encoding="UTF-8"?>
<!DOCTYPE beans PUBLIC "-//SPRING//DTD BEAN//EN"
"http://www.springframework.org/dtd/spring-beans.dtd">
<beans>
<bean id="dataSource"
 class="org.apache.commons.dbcp.BasicDataSource"
 destroy-method="close">
 <property name="driverClassName">
   <value>oracle.jdbc.driver.OracleDriver</value>
 </property>
 <property name="url">
   <value>jdbc:oracle:thin:@localhost:1521:orcl</value>
 </property>
 <property name="username">
   <value>scott</value>
 </property>
 <property name="password">
   <value>tiger</value>
 </property>
</bean>

<!-- Configure DAO -->
<bean id="empDao" class="data.DAO">
 <property name="dataSource">
   <ref bean="dataSource"></ref>
 </property>
</bean>
<!-- Configure Business Service -->
<bean id="businessInterface" class="business.BusinessInterface">
 <property name="dao">
   <ref bean="empDao"></ref>
 </property>
</bean>
<bean name="/search" class="actions.SearchAction">
 <property name="businessInterface">
   <ref bean="businessInterface" />
 </property>
</bean>
</beans>
WEB-INF/applicationContext.xml
Note that SearchAction is defined here, instead of in the struts-config.xml. The bean name "/search" is used to as a link between this file and struts-config.xml. - Create the Sorter class: This is used in the JSP for sorting the result list.
public class Sorter {
public static List sort(Listlist, String sortBy) {
Comparator comp = getComparator(sortBy);
Collections.sort(list, comp);
return list;
}
private static Comparator getComparator(String sortBy) {
System.out.println("Sort by : " + sortBy);
if (sortBy == null) {
return new NameComparator();
}
if (sortBy.equals("empName"))
return new NameComparator();
if (sortBy.equals("empId"))
return new IdComparator();
if (sortBy.equals("empSal"))
return new SalComparator();
if (sortBy.equals("empJob"))
return new JobComparator();
return null;
}
private static class NameComparator implements Comparator {
public int compare(Object emp1, Object emp2) {
Employee employee1 = (Employee) emp1;
Employee employee2 = (Employee) emp2;
return employee1.getEmpName().compareTo(employee2.getEmpName());
}
}
private static class IdComparator implements Comparator {
public int compare(Object emp1, Object emp2) {
Employee employee1 = (Employee) emp1;
Employee employee2 = (Employee) emp2;
return new Long(employee1.getEmpId()).compareTo(new Long(employee2.getEmpId()));
}
}
private static class SalComparator implements Comparator {
public int compare(Object emp1, Object emp2) {
Employee employee1 = (Employee) emp1;
Employee employee2 = (Employee) emp2;
return new Long(employee1.getEmpSal()).compareTo(new Long(employee2.getEmpSal()));
}
}
private static class JobComparator implements Comparator {
public int compare(Object emp1, Object emp2) {
Employee employee1 = (Employee) emp1;
Employee employee2 = (Employee) emp2;
return employee1.getEmpJob().compareTo(employee2.getEmpJob());
}
}
}Sorter.java - Create the Value object: The Employee.java bean used in the row mapper is shown below.
public class Employee {
public long empId;
public String empName;
public String empJob;
public long empSal;
public long getEmpId() {
 return empId;
}
public void setEmpId(long empId) {
 this.empId = empId;
}
public String getEmpJob() {
 return empJob;
}
public void setEmpJob(String empJob) {
 this.empJob = empJob;
}
public String getEmpName() {
 return empName;
}
public void setEmpName(String empName) {
 this.empName = empName;
}
public long getEmpSal() {
 return empSal;
}
public void setEmpSal(long empSal) {
 this.empSal = empSal;
}
}
Employee.java
- JAR Files: In order for you to run this example, you must have the following jar files in your class path: displaytag-1.1.jar || commons-chain-1.1.jar || commons-collections.jar || commons-dbcp.jar || commons-digester-1.6.jar || commons-lang.jar || commons-logging.jar || commons-pool-1.3.jar || commons-validator-1.3.0.jar || commons-beanutils.jar || displaytag-export-poi-1.1.jar || jta.jar || ojdbc14.jar || oro-2.0.8.jar || spring.jar || struts-core-1.3.5.jar || struts-taglib-1.3.5.jar || struts-tiles-1.3.5.jar || xml-apis.jar
- Tomcat Server
- Java 5.0
- A log4j configuration file.
Data Access with Spring and Struts: Part 1
The struts pagination post contained an example of using Hibernate for data access too. In this post, I use the same example to implement the same pagination example using Spring. In this part we will see how to get a struts application ready for spring, the next part describes how to implement data access in spring. Follow these steps to run the example.
- Start with the struts-blank application
- Create the search.jsp file
<%@ page language="java" contentType="text/html; charset=ISO-8859-1" pageEncoding="ISO-8859-1"%>
<%@ taglib uri="http://struts.apache.org/tags-bean" prefix="bean"%>
<%@ taglib uri="http://struts.apache.org/tags-html" prefix="html"%>
<%@ taglib uri="http://struts.apache.org/tags-logic" prefix="logic"%>
<%@ taglib uri="http://displaytag.sf.net" prefix="display"%>
<%@ page import="beans.Employee,business.Sorter,java.util.List,org.displaytag.tags.TableTagParameters,org.displaytag.util.ParamEncoder"%>
<html:html>
<head>
<title>Search page</title>
<link rel="stylesheet" type="text/css"
href="/StrutsPaging/css/screen.css" />
</head>
<body bgcolor="white">
<html:form action="/search.do">
<table>
 <tr>
   <td>Minimum Salary:</td>
   <td><html:text property="minSalary"></html:text></td>
 </tr>
 <tr>
   <td colspan="2"><html:submit property="submit" /></td>
 </tr>
</table>
</html:form>
<logic:notEqual name="empList" value="null">
<jsp:scriptlet>
 if (session.getAttribute("empList") != null) {
   String sortBy = request.getParameter((new ParamEncoder("empTable")).encodeParameterName(TableTagParameters.PARAMETER_SORT));
   Sorter.sort((List) session.getAttribute("empList"), sortBy);
 }
</jsp:scriptlet>

<display:table name="sessionScope.empList" pagesize="4" id="empTable" sort="external" defaultsort="1" defaultorder="ascending" requestURI="">
 <display:column property="empId" title="ID" sortable="true" sortName="empId" headerClass="sortable" />
 <display:column property="empName" title="Name" sortName="empName" sortable="true" headerClass="sortable" />
 <display:column property="empJob" title="Job" sortable="true" sortName="empJob" headerClass="sortable" />
 <display:column property="empSal" title="Salary" sortable="true" headerClass="sortable" sortName="empSal" />
</display:table>
</logic:notEqual>
</body>
</html:html>
pages/search.jsp - Create the Action class:
public class SearchAction extends Action {
private BusinessInterface businessInterface;
public ActionForward execute(ActionMapping mapping, ActionForm form, HttpServletRequest request, HttpServletResponse httpservletresponse) throws Exception {
 if (form == null) {
   return mapping.findForward("success");
 }
 try {
   SearchForm searchForm = (SearchForm) form;
   if (searchForm.getMinSalary() == null || searchForm.getMinSalary().equals("")) {
     return mapping.findForward("success");
   }
   long minSal = Long.parseLong(searchForm.getMinSalary());
   System.out.println("Business Interface: " + businessInterface);
   List data = businessInterface.getData(minSal);
   System.out.println("Data : " + data);
   request.getSession().setAttribute("empList", data);

 } catch (Exception e) {
   e.printStackTrace();
 }
 return mapping.findForward("success");
}

  public void setBusinessInterface(BusinessInterface bi) {
    businessInterface = bi;
  }
}
SearchAction.java
Note that the action class has a property businessInterface. This property will be set by spring when loading the action class. - Define the form and action beans in struts-config.xml
<form-beans>
Note that, in the action-mapping, the action type is defined as "org.springframework.web.struts.DelegatingActionProxy". This will ensure that Spring will take care of handling struts actions.
<form-bean name="searchForm" type="forms.SearchForm" />
</form-beans>
<action-mappings>
<action path="/Welcome" forward="/pages/Welcome.jsp" />
<action name="searchForm" path="/search" scope="session" type="org.springframework.web.struts.DelegatingActionProxy">
<forward name="success" path="/pages/search.jsp"></forward>
</action>
</action-mappings> - Integrate Struts And Spring: The final step of integration is to add a spring plugin to struts-config.xml. The plugin defines the location of the spring bean-factory definitions.
<plug-in className="org.springframework.web.struts.ContextLoaderPlugIn">
This is one way of integrating struts and spring, for other ways of integration, refer to : Get a better handle on Struts actions, with Spring
<set-property property="contextConfigLocation"
value="/WEB-INF/applicationContext.xml"/>
</plug-in>
Wednesday, 3 July 2013
Using Sitemesh with Struts 2.0
SiteMesh is a web-page layout and decoration framework and web-application integration framework like Tiles that can be used to give a consistent look and feel to your site. While tiles, which works with templates, SiteMesh acts as a decorator around your HTML pages that go through the web-server. SiteMesh can also include entire HTML pages as a Panel within another page. Using this feature, Portal type web sites can be built very quickly and effectively. As one might expect, SiteMesh works with Servlet filters to achieve this. The following example demonstrates the use of SiteMesh with Struts 2.0. I am just going to use the struts-blank application and add SiteMesh decorator to the welcome page.
Setup SiteMesh
This completes the setup of your web application for using sitemesh.
Creating Decorators
Once your web application is setup for SiteMesh, you can start writing your decorators. For this, first create a decorators.xml file in your WEB-INF directory. For this example we will define a single decorator layout.jsp. The decorators.xml file is shown below
Once we define the decorators in the decorators.xml file, we have to create the decorators themselves. The following is the code for layout.jsp
The paneldata.html is a simple html page shown below:
If you know tiles, this page is quite self explanatory. The main difference is the way in which this works. The decorator:body tag holds the actual page that is requested. This is made possible by the filter mapping in web.xml and the mapping of "/*" to main layout in decorators.xml file. Whereas in tiles, you have to push the pages into the template file, SiteMesh pulls the requested page into the template (this is not true in the case of applyDecorator though).
Setup SiteMesh
- Import struts-blank.war into Eclipse and rename it.
- Download the latest version of SiteMesh (v2.3) from here.
- Copy sitemesh-2.3.jar to the WEB-INF/lib folder of your web application.
- Add a filter mapping for sitemesh to web.xml file. As discussed in the previous post (Struts 2.0 controller), you need to add the ActionContextCleanup filter too. Your web.xml filter descriptions should look like this:
<filter>
 <filter-name>struts-cleanup</filter-name>
 <filter-class>
  org.apache.struts2.dispatcher.ActionContextCleanUp
 </filter-class>
</filter>
<filter>
 <filter-name>sitemesh</filter-name>
 <filter-class>
  com.opensymphony.module.sitemesh.filter.PageFilter
 </filter-class>
</filter>
<filter>
 <filter-name>struts2</filter-name>
 <filter-class>
  org.apache.struts2.dispatcher.FilterDispatcher
 </filter-class>
</filter>

<filter-mapping>
 <filter-name>struts-cleanup</filter-name>
 <url-pattern>/*</url-pattern>
</filter-mapping>
<filter-mapping>
 <filter-name>sitemesh</filter-name>
 <url-pattern>/*</url-pattern>
</filter-mapping>
<filter-mapping>
 <filter-name>struts2</filter-name>
 <url-pattern>/*</url-pattern>
</filter-mapping>
This completes the setup of your web application for using sitemesh.
Creating Decorators
Once your web application is setup for SiteMesh, you can start writing your decorators. For this, first create a decorators.xml file in your WEB-INF directory. For this example we will define a single decorator layout.jsp. The decorators.xml file is shown below
<?xml version="1.0" encoding="ISO-8859-1"?>
<decorators defaultdir="/decorators">
 <decorator name="main" page="layout.jsp">
  <pattern>/*</pattern>
 </decorator>
 <decorator name="panel" page="panel.jsp" />
</decorators>
Once we define the decorators in the decorators.xml file, we have to create the decorators themselves. The following is the code for layout.jsp
<%@ taglib uri="http://www.opensymphony.com/sitemesh/decorator"The following is the code for panel.jsp
prefix="decorator"%>
<%@ taglib uri="http://www.opensymphony.com/sitemesh/page"
prefix="pages"%>
<html>
<head>
<title>My Site - <decorator:title default="Welcome!" /></title>
<decorator:head />
</head>
<body>
<table>
<tr>
<td bgcolor="skyblue"><pages:applyDecorator page="/paneldata.html"
name="panel" title="Left Panel" /></td>
<td><decorator:body /></td>
<td bgcolor="gray"><pages:applyDecorator page="/paneldata.html"
name="panel" title="Right Panel" /></td>
</tr>
</table>
</body>
</html>
<%@ taglib uri="http://www.opensymphony.com/sitemesh/decorator" prefix="decorator" %>

 <table border="0" cellpadding="1px" cellspacing="2px">
  <tr>
   <th class="panelTitle">
    <decorator:title default="Panel Title here" />
   </th>
  </tr>
  <tr>
   <td class="panelBody">
    <decorator:body />
   </td>
  </tr>
 </table>
The paneldata.html is a simple html page shown below:
<html>
<head>
<meta http-equiv="Content-Type" content="text/html; charset=ISO-8859-1">
</head>
<body>
Panel data goes here.
</body>
</html>
If you know tiles, this page is quite self explanatory. The main difference is the way in which this works. The decorator:body tag holds the actual page that is requested. This is made possible by the filter mapping in web.xml and the mapping of "/*" to main layout in decorators.xml file. Whereas in tiles, you have to push the pages into the template file, SiteMesh pulls the requested page into the template (this is not true in the case of applyDecorator though).
Tuesday, 2 July 2013
explain JSF framework compare with the Struts framework
Struts framework versus JavaServer Faces
JSF is in its early access release and as a result somewhat
immature.
Command design pattern. Struts framework has got
only single event handler for the HTTP request.
The heart of JSF framework is the Page Controller Pattern where
there is a front controller servlet where all the faces request go
through with the UI components and then fire off events for each
component and render the components using a render toolkit. So
JSF can have several event handlers on a page. Also JSF
loosely couples your model, where it can hook into your model (i.e
unlike Struts your model does not have to extend JSF classes).
JSF was built with a component model in mind to allow RAD. JSF
can be thought of as a combination of Struts framework for thin
clients and the Java Swing user interface framework for thick
clients.
Has got flexible page navigation using navigation rules
inside the struts-config.xml file and Action classes
using maoping.findForward(…) .
JSF allows for more flexible navigation and a better design
because the navigation rule (specified in faces-config.xml ) is
decoupled from the Action whereas Struts forces you to hook
navigation into your Action classes.
migrated to use JSF component tags instead of the
original Struts HTML tags because Struts tags are
superseded and also not undergoing any active
development. You can also use the Struts-Faces
Integration library to migrate your pages one page at
a time to using JSF component tags.
JSF is more flexible than Struts because it was able to learn from
Struts and also extensible and can integrate with RAD tools etc.
So JSF will be a good choice for new applications.?
- Matured since Struts has been around for a few years.
JSF is in its early access release and as a result somewhat
immature.
- The heart of Struts framework is the Controller, which
Command design pattern. Struts framework has got
only single event handler for the HTTP request.
The heart of JSF framework is the Page Controller Pattern where
there is a front controller servlet where all the faces request go
through with the UI components and then fire off events for each
component and render the components using a render toolkit. So
JSF can have several event handlers on a page. Also JSF
loosely couples your model, where it can hook into your model (i.e
unlike Struts your model does not have to extend JSF classes).
- Struts does not have the vision of Rapid Application
JSF was built with a component model in mind to allow RAD. JSF
can be thought of as a combination of Struts framework for thin
clients and the Java Swing user interface framework for thick
clients.
Has got flexible page navigation using navigation rules
inside the struts-config.xml file and Action classes
using maoping.findForward(…) .
JSF allows for more flexible navigation and a better design
because the navigation rule (specified in faces-config.xml ) is
decoupled from the Action whereas Struts forces you to hook
navigation into your Action classes.
- Struts is a sturdy frame work which is extensible and
migrated to use JSF component tags instead of the
original Struts HTML tags because Struts tags are
superseded and also not undergoing any active
development. You can also use the Struts-Faces
Integration library to migrate your pages one page at
a time to using JSF component tags.
JSF is more flexible than Struts because it was able to learn from
Struts and also extensible and can integrate with RAD tools etc.
So JSF will be a good choice for new applications.?
The Struts 2.0 Controller
The major difference in architecture of Struts 2.0 is in the controller. Instead of the controller servlet of Struts 1.x (ActionServlet), Struts 2.0 introduces a Servlet Filter (FilterDispatcher). The filter has to be configured in the web.xml, as follows
<filter>You don't have to declare a tag library as it is included in struts-core.jar. Using filters in a web application has many advantages, such as:
<filter-name>struts2</filter-name>
<filter-class>org.apache.struts2.dispatcher.FilterDispatcher</filter-class>
</filter>
<filter-mapping>
<filter-name>struts2</filter-name>
<url-pattern>/*</url-pattern>
</filter-mapping>
- You can cascade functionality in multiple Filters, without modifying the code in the rest of the app.
- Filters can wrap the request and response they hand on to the rest of the app, adding additional functionality there.
- Filters could be used to perform pre-processing on the request, and/or post-processing on the response, to perform data transformations required by the application.
- Filters can be used to enforce "users do not have direct access to a JSP page"
- Filters can let you use existing servlets be used as Actions, without giving up things like the form bean processing.
- Filters can, in effect, "remap" request URIs by doint a RequestDispatcher.forward() to the new target.
- Filters apply to requests for static content, as well as requests to the controller servlet and JSP pages, so you can do extra processing around them as well.
<filter>
   <filter-name>struts-cleanup</filter-name>
   <filter-class>org.apache.struts2.dispatcher.ActionContextCleanUp</filter-class>
</filter>
<filter>
   <filter-name>sitemesh</filter-name>
   <filter-class>org.apache.struts2.sitemesh.VelocityPageFilter</filter-class>
</filter>
<filter>
   <filter-name>struts</filter-name>
   <filter-class>org.apache.struts2.dispatcher.FilterDispatcher</filter-class>
</filter>

<filter-mapping>
   <filter-name>struts-cleanup</filter-name>
   <url-pattern>/*</url-pattern>
</filter-mapping>
<filter-mapping>
   <filter-name>sitemesh</filter-name>
   <url-pattern>/*</url-pattern>
</filter-mapping>
<filter-mapping>
   <filter-name>struts</filter-name>
   <url-pattern>/*</url-pattern>
</filter-mapping>
Monday, 1 July 2013
Integrating Struts 2.0 and tiles
I am currently evaluating some web frameworks for a pet project and was trying to implement Struts 2 with tiles. Neither the Sturts 2 website, nor the tiles website gave an easy way to integrated Struts 2 and tiles. It took me a while to get them to work together. This post describes a way I figured out how to integrate Struts 2 with tiles. Struts 2 provides a plugin for integrating tiles 2. This plugin is included in the complete bundle (struts-2.x.x.x-all.zip). The following are are the steps needed to integrate struts2 with tiles.
Skip to Sample Code
Skip to Sample Code
- Download the struts complete bundle from the struts 2 website
- Download tiles 2 from tiles 2 website
- Download the tiles dependencies from the jakarta commons site
- Commons BeanUtils 1.7.0 or above
- Commons Digester 1.8 or above
- Commons Logging 1.1 or above
- Create the layout page, and related files (except the layout, all the other files are basic jsps )
<%@ taglib uri="http://tiles.apache.org/tags-tiles" prefix="tiles" %>
<html>
<head>
<title>Insert title here</title>
</head>
<body>
<table width="100%" height="100%">
 <tr height="20%">
  <td colspan="2" align="center" bgcolor="skyblue">
  <tiles:insertAttribute name="header" /></td>
 </tr>
 <tr>
  <td bgcolor="cyan" width="75%"><tiles:insertAttribute name="body" /></td>
 </tr>
 <tr height="20%">
  <td colspan="2" align="center" bgcolor="skyblue"><tiles:insertAttribute name="footer" /></td>
 </tr>
</table>
</body>
</html> - Create the HelloWorld Action class
package example;

import com.opensymphony.xwork2.ActionSupport;

public class HelloWorld extends ActionSupport {

 public String execute() throws Exception {
  System.out.println("Hello World");
  return SUCCESS;
 }
} - Configure the Web Deployment descriptor by adding a tiles listener to the web.xml file of your web application.
<?xml version="1.0" encoding="UTF-8"?>
<web-app xmlns:xsi="http://www.w3.org/2001/XMLSchema-instance"
 xmlns="http://java.sun.com/xml/ns/javaee"
 xmlns:web="http://java.sun.com/xml/ns/javaee/web-app_2_5.xsd"
 xsi:schemaLocation="http://java.sun.com/xml/ns/javaee http://java.sun.com/xml/ns/javaee/web-app_2_5.xsd"
 id="WebApp_ID" version="2.5">
 <display-name>tilesTest</display-name>
 <listener>
  <listener-class>
   org.apache.struts2.tiles.StrutsTilesListener
  </listener-class>
 </listener>
 <filter>
  <filter-name>struts2</filter-name>
  <filter-class>
   org.apache.struts2.dispatcher.FilterDispatcher
  </filter-class>
 </filter>
 <filter-mapping>
  <filter-name>struts2</filter-name>
  <url-pattern>/*</url-pattern>
 </filter-mapping>
 <welcome-file-list>
  <welcome-file>index.html</welcome-file>
 </welcome-file-list>
</web-app> - Configure struts to work with tiles, this can be done by either
- Extending the sturts package from "tiles-default"
<package name="tilesTest" extends="tiles-default">
OR - Declaring a new "result-type", tiles, that will map to "org.apache.struts2.views.tiles.TilesResult"
<result-types>
<result-type name="tiles" class="org.apache.struts2.views.tiles.TilesResult" />
</result-types>
- Extending the sturts package from "tiles-default"
- Set the type of the results in the package to "tiles"
<result name="success" type="tiles">helloworld.home</result>
struts.xml<?xml version="1.0" encoding="UTF-8" ?>
Note that the result "helloword.home" must match the definition name in tiles.xml file.
<!DOCTYPE struts PUBLIC
"-//Apache Software Foundation//DTD Struts Configuration 2.0//EN"
"http://struts.apache.org/dtds/struts-2.0.dtd">
<struts>
<package name="tilesTest" extends="struts-default">
<result-types>
<result-type name="tiles" class="org.apache.struts2.views.tiles.TilesResult" />
</result-types>
<action name="helloWorld" class="example.HelloWorld">
<result name="success" type="tiles">helloworld.home</result>
</action>
</package>
</struts> - Create definitions for tiles in WEB-INF/tiles.xml file.
<!DOCTYPE tiles-definitions PUBLIC
    "-//Apache Software Foundation//DTD Tiles Configuration 2.0//EN"
    "http://tiles.apache.org/dtds/tiles-config_2_0.dtd">
<tiles-definitions>
 <definition name="helloworld.home" template="/layouts/layout.jsp">
  <put-attribute name="header" value="/layouts/header.jsp" />
  <put-attribute name="body" value="/index.html" />
  <put-attribute name="footer" value="/layouts/footer.jsp" />
 </definition>
</tiles-definitions> - The following is a list of jar files used for this example (copied to the WEB-INF/lib directory)
- commons-beanutils.jar
- commons-digester-1.8.jar
- commons-logging-1.1.1.jar
- freemarker-2.3.8.jar
- ognl-2.6.11.jar
- struts2-core-2.0.11.1.jar
- struts2-tiles-plugin-2.0.11.1.jar
- tiles-api-2.0.5.jar
- tiles-core-2.0.5.jar
- tiles-jsp-2.0.5.jar
- xwork-2.0.4.jar
- This example was implemented on tomcat 6.0.16, with Java 5 update 11
Using Displaytag with tiles
If you run the example in the previous post, with each click on the related table you will see that the URL has changed to reflect that of the JSP
http://localhost:8090/StrutsPaging/pages/search.jsp?d-3999332-p=2This may cause problems when using Struts with tiles. In order to avoid the problem you have to change add a new attribute to the display:* tag
requestURI=""In the JSP file in step 2 of "Struts: Paging and Sorting with Displaytag", change the display:table tag, change the tag to look as shown below:
<display:table name="sessionScope.empList" pagesize="4" id="empTable" sort="external" defaultsort="1" defaultorder="ascending" requestURI="">Now, the URL appears as shown below
http://localhost:8090/StrutsPaging/search.do?d-3999332-o=2&d-3999332-s=empName&d-3999332-p=1&d-3999332-n=1This solution in mentioned in the displaytag FAQ page(Had to dig a little to find it :) ). Once you have done this, you can safely use it with tiles too.
Subscribe to:
Posts (Atom)
LinkWithin
